
Whether you are a student, professional or a designer Snipping Tool shortcut is something that will save you hours per week. ShareScreen is the easiest way to capture, annotate and share your screen in a short time without all the hassles of switching between different apps.
Also, Screenshots have become a fundamental part of every day working – from snapping over to provide quick visual communication to saving issues or small bits of information. And even though various tools have been developed, they are not as convenient and not used like the Snipping Tool on Windows.
In this guide, we are going to go over everything regarding the Snipping Tool including how to use the shortcuts for the tool, along with a few advanced tips that will help you to make the most out of this tool.
What Is the Snipping Tool?
The Snipping Tool is Windows’ default tool for screenshots, and can be used to capture screenshots of your screen, or your display as a whole. It has been implemented in Windows Vista and with the years it has improved much – certainly after the merging with Snip & Sketch in Windows 10 and Windows 11.
It allows the user to capture either rectangular, freeform or full screen images which can be very easily annotated. With the speed and capability to edit, record delays and inbuilt applications for mark up, it is an invaluable part of any user’s workflow.
But the really magic is learning its keyboard shortcuts.
Snipping tool Shortcut: The quickest way to record your screen
Basically to get around the lengthy path of making the manual open of the app, the next handy shortcut that you can know about, is this:
Shortcut Key To Launch Snipping Tool in Windows 10/11:
Windows Key + Shift + S
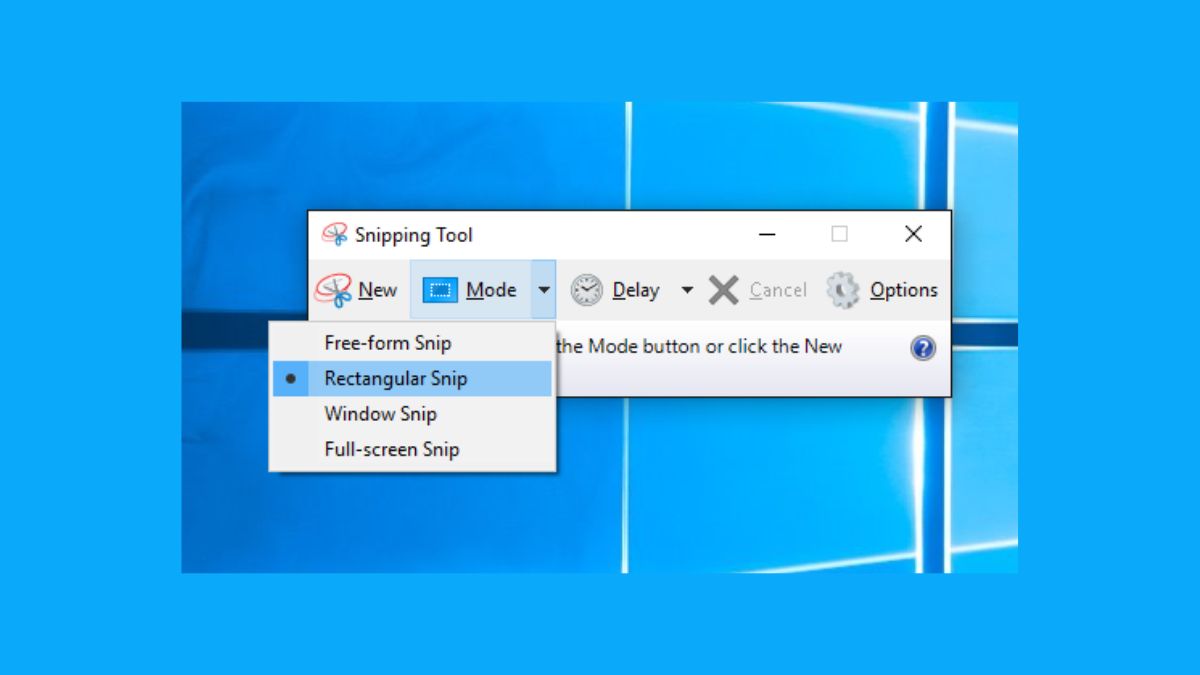
This combination immediately calls my snorting toolbar on your screen with four options for capture:
- Rectangular Cut – In order to cut out any area with a rectangular shape
- Freeform Snip – Draw in any shape and record this
- Window Snip – Saves an application window that has been selected.
- Snip Full Screen – Snip Yourself Screenshots of the entire screen
Once you make the cut that goes automatically to your clipboard. You can copy and paste to any application (such as Paint, Word or an e-mail program) or launch it directly in the Snipping Tool editor to add annotations to it.
This shortcut is way faster than using Print Screen (PrtSc) or the method of manual opening of the Snipping Tool from Start menu.
Why Snip Tool Shortcut and Not Print screen?
Taking a snapshot with the PrtSc key is still very popular, but if you take a screenshot using the Snipping Tool trick you will be more controlled as well as flexible doing so. Here’s why it’s better:
- Quick access – No need to open Paint or some other application
- Partial capture: Finesse can be narrowed down to exactly what do you really want to capture.
- Annotations: Highlight, arrows and text highlights can be directly added.
- Clipboard integration: Copy & paste everywhere at light speed!
- Multi-screen support: You are able to easily choose the screen you want to record.
In brief, it’s a better, faster, smarter and cleaner screenshots program, especially if you do multitasking and shoot screenshots of your work.
The Snipping Tool: How It Can Be Used to Increase Productivity
For professionals that have to do a lot of screenshots (computers for developers, writers, designers, educators, and analysts) the Snipping Tool hotkey can save literally hours every week. Here’s how:
- Easy Documentation: You can make steps, bugs or screenshots documentation even but easy.
- Collaborative: Can deliver a visual feedback without having to type long explanations.
- Remote Work Efficiency: Screenshots can be used in presentations or for troubleshooting
- Export Work: Make changes to UI parts or designs
- Screen capture: Use annotation tools to your screen capture to use for tutorials or when using online sessions.
By removing several steps down the line into just a short cut you boost the repetitive workflows and make the process more efficient.
Power Tips Tricks & Techniques for Advanced Users
If you have already known the basics here are few pro tips on how you can produce the most out of your Snipping Tool:
1. Delay Snip
You can also delay your screenshot by 3, 5 or 10 seconds – perfect for taking captures of drop down menus and hover effects which are temporary.
2. Markup and Highlight
Once you have captured a clip, you will have the ability to annotate on your image with the pen, highlighter, and eraser tool.
3. Save Automatically
Go to Settings>Auto Copy to Clipboard and select to make sure that all snapshots are ready to paste at once.
4. Recording Video Clips (Windows 11 Only)
In this new update, the Snipping Tool contains the feature of screencapture. In addition, this feature makes it easier to record short demos or tutorials.
5. Integrate With OneDrive
Enable automatic screenshots upload to OneDrive for easy access and sharing in the cloud.
Conclusion
Snipping Tool Shortcut (Windows + Shift + S) is one of the least complex but the most powerful utility in windows. It’s fast, stable and used by everybody from a casual user to the giga plus job doers.
By the time you can use this shortcut less clicks will be required to locate something, less time will be wasted and you will be more efficient with your daily workflow. With its additional capabilities such as annotating, screen recording and cloud integration, the Snipping Tool is not just a tool – it’s a productivity superstar that saves you hours a week.
So, next time you want to have a quick go screenshot you should forget about the Print Screen button and tap on the Windows + Shift + S buttons and thank your future self for making you grateful of convenience!